WDW Lightning Lane Pass Tips & Tricks: How to Skip the Lines Like a Pro
Walt Disney World’s Lightning Lane system can feel overwhelming at first—but once you understand how it works, it can completely transform your park days. With the right strategy, you’ll spend less time waiting in line and more time enjoying attractions, dining, and Disney magic.
Dream Trip Co
1/3/20263 min read

WDW Lightning Lane Pass Tips & Tricks: How to Skip the Lines Like a Pro
Walt Disney World’s Lightning Lane system can feel overwhelming at first—but once you understand how it works, it can completely transform your park days. With the right strategy, you’ll spend less time waiting in line and more time enjoying attractions, dining, and Disney magic.
In this guide, we’ll break down Lightning Lane basics, plus share pro tips and tricks to help you get the most value out of your time and money.
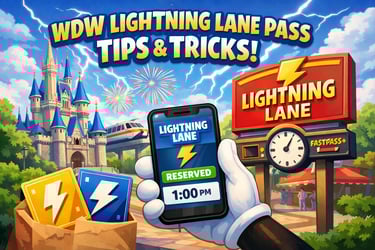
What Is Lightning Lane at Walt Disney World?
Lightning Lane allows guests to skip the standby line by reserving a return window for select attractions. Depending on the ride, you’ll enter a shorter, expedited queue at your scheduled time.
There are currently three Lightning Lane options at WDW:
1. Lightning Lane Multi Pass
Covers multiple attractions per park
Book one ride at a time
After using a reservation, you can book another
Price varies by park and date
2. Lightning Lane Single Pass
For top-tier, high-demand attractions
Purchased individually (not included in Multi Pass)
Limited availability
Examples include TRON Lightcycle / Run and Rise of the Resistance
3. Standby Lines (Still Important!)
Not every ride offers Lightning Lane, and some standby waits are surprisingly short—especially early or late in the day.
Lightning Lane Booking Basics You Must Know
Before we dive into tips, make sure you understand these fundamentals:
Lightning Lane reservations are made in the My Disney Experience app
Popular attractions can sell out quickly
You must arrive during your return window (usually a 1-hour window)
Lightning Lane does not guarantee immediate boarding—but waits are much shorter
Pro Tips & Tricks for Using Lightning Lane Like a Disney Expert
1. Prioritize Rides with the Longest Standby Waits
Use Lightning Lane for attractions that consistently have long lines, such as:
Seven Dwarfs Mine Train
Peter Pan’s Flight
Slinky Dog Dash
Remy’s Ratatouille Adventure
Avoid “wasting” Lightning Lane on rides with short or manageable standby waits.
2. Book Early in the Day, Ride Later
Morning booking times matter. Secure high-demand rides early—even if your return time is later in the day. This locks in availability and gives you flexibility to stack rides.
3. Stack Lightning Lanes for Afternoon & Evening
If you plan to take a midday break or hop parks, stack your Lightning Lane reservations for later hours. This is especially powerful for:
Hot afternoons
Park hopping strategies
Evening fireworks days
4. Rope Drop + Lightning Lane = Maximum Efficiency
Arrive early and ride top attractions via standby at rope drop. Then use Lightning Lane later for the same park when waits are longest. This combo can save hours of waiting.
5. Refresh the App for Better Times
Lightning Lane availability changes constantly as guests cancel or modify plans. Refreshing the app can reveal:
Earlier return times
Sold-out attractions reopening
Better ride sequencing opportunities
Persistence pays off.
6. Save Single Pass for Must-Do Attractions
Single Pass rides are expensive but often worth it if:
It’s your only park day
The attraction is a top priority
Standby waits exceed 90–120 minutes
If the ride is “can’t miss,” don’t gamble on standby.
7. Don’t Forget Height & Rider Restrictions
Before booking, confirm everyone in your group can ride. Nothing is worse than wasting a Lightning Lane reservation because of height requirements or ride intensity.
8. Watch the Clock—Grace Periods Are Limited
Disney allows a small grace period, but it’s not guaranteed. Arrive on time whenever possible, especially for high-demand rides.
Best Lightning Lane Strategy by Park (Quick Overview)
Magic Kingdom
Focus on Seven Dwarfs Mine Train, Peter Pan’s Flight, Jungle Cruise
Use rope drop for Fantasyland rides
EPCOT
Remy’s Ratatouille Adventure and Frozen Ever After are top priorities
Stack rides for World Showcase afternoons
Hollywood Studios
One of the most Lightning Lane–dependent parks
Slinky Dog Dash, Rise of the Resistance, and Tower of Terror are key
Animal Kingdom
Fewer Lightning Lane rides
Avatar Flight of Passage is the top priority
Rope drop works exceptionally well here
Is Lightning Lane Worth It?
Lightning Lane is most valuable if:
You’re visiting during peak or holiday seasons
You have limited park days
You’re traveling with kids or first-time visitors
If crowds are low and you’re flexible, standby and rope drop strategies may be enough.
Final Thoughts
Lightning Lane isn’t about booking every ride—it’s about booking the right rides at the right time. With smart planning, a little flexibility, and frequent app checks, you can dramatically reduce wait times and enjoy more of what Walt Disney World has to offer.
✨ Pro tip: Decide your must-do attractions before your trip, and build your Lightning Lane strategy around them.
Happy park hopping—and may your wait times be short! ⚡🏰
Dream Trip Co
is registered with the State of Florida as a Seller of Travel.
Registration #ST45725
Custom vacations tailored to your unique preferences.
Call Or Text
© 2025. All rights reserved.